Before you start |
||
|
||
System installation |
||
 |
Linux installation prompt - this screen is shown only when booting from CD/DVD. |
|
 |
Installation language selection |
|
 |
Keyboard selection - standard CERN PCs are delivered with US keyboard. |
|
 |
Installation method selection - recommended method is HTTP. |
|
 |
Network setup Note: Disable IPv6 configuration on your system: for now at CERN IPv6 is not routed and selecting this option will slow-down your system startup. Note: CERN is providing a DHCP service for all systems registered on the network. Please verify on Network Connection page that system you are installing SLC on can obtain IP address automatically (HCP Response). |
|
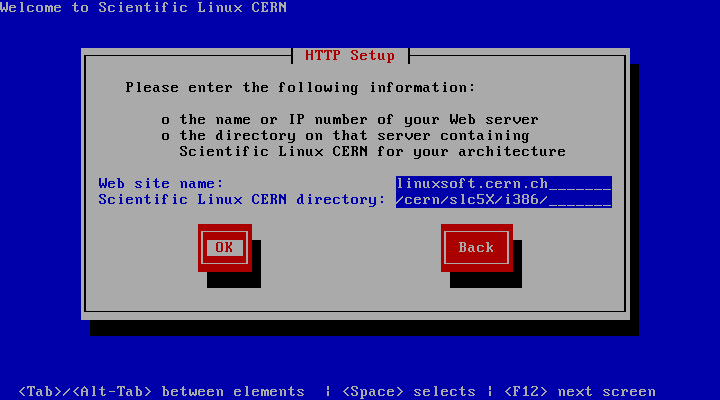 |
Specification of the Linux installation image location. The default values should be OK. | |
 |
|
|
 |
Note: Upgrade from previous SLC versions is NOT SUPPORTED. |
|
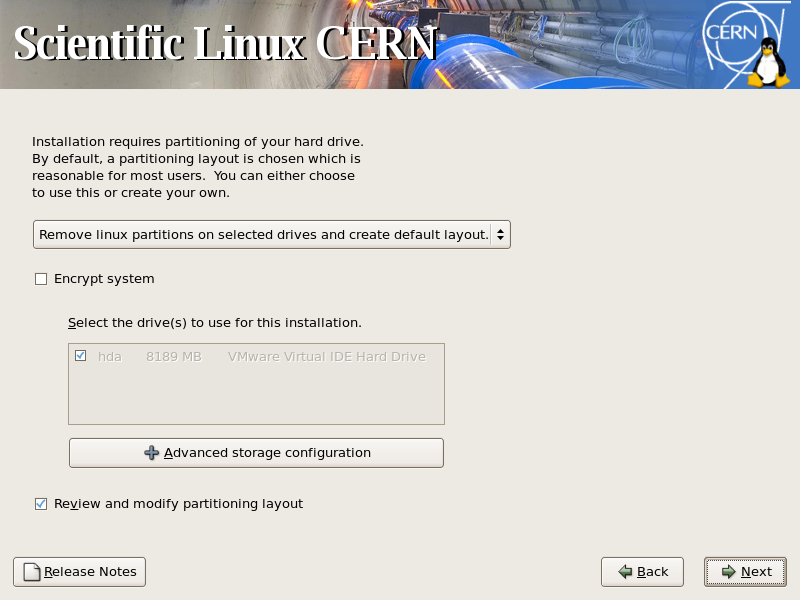 |
Partitioning of the hard drive. | |
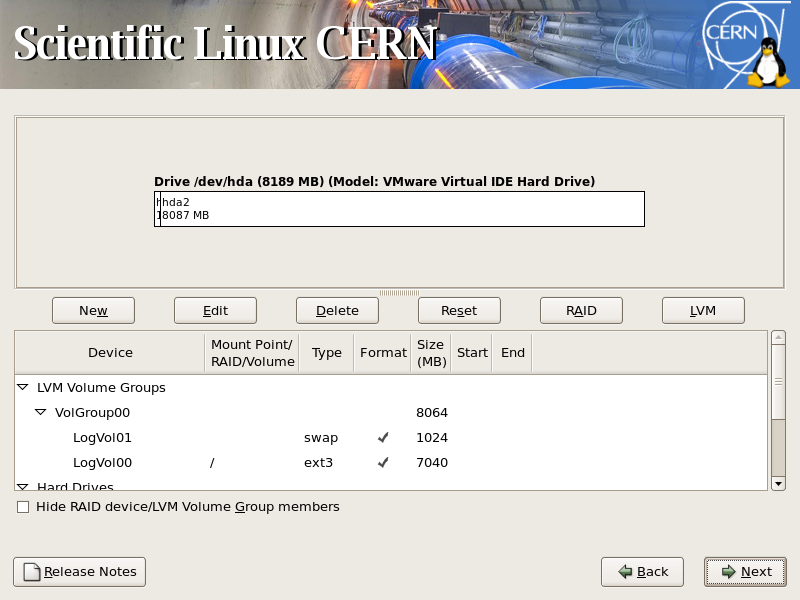 |
Automatic partioning option will preallocate separate /boot, swap and / partitions (/boot of 128 or 256 MB, swap of the size of system memory and / using the rest of available disk space). | |
 |
Boot loader settings. | |
 |
Network devices settings. Note: if you set the hostname manually, we recommend that you specify a Fully Qualified HostName, ie. lxtest.cern.ch |
|
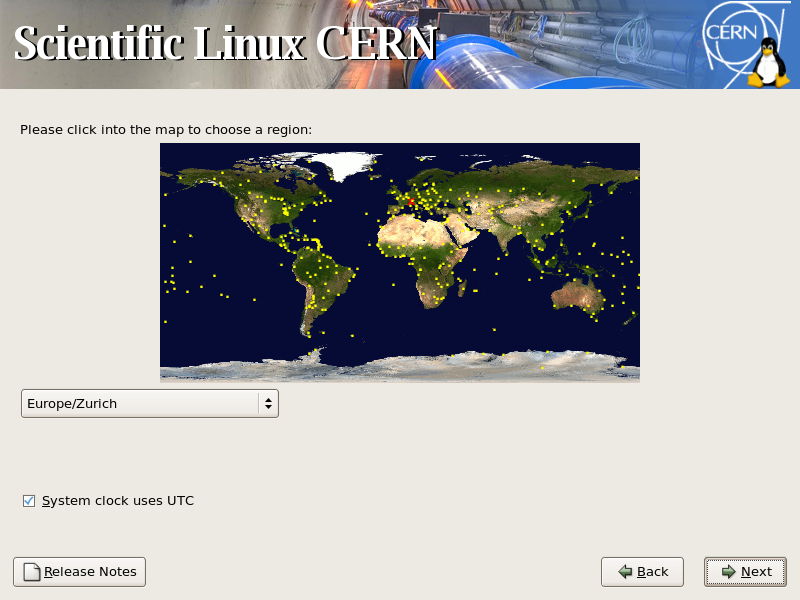 |
Time zone settings. | |
 |
Root (administrative account) password setting. |
|
 |
Note We advise to choose CERN Recommended Setup for Workstations option This screen gives also possibility of customizing package selection: however this task can be also handled later after system installation. For machines with small amounts of memory it may be useful to unselect the "Productivity" tools (ie. OpenOffice), which are huge and may block the installation. |
|
 |
System is about to start installation. If changes of settings are needed this is last opportunity to click the Back button and make adjustments. |
|
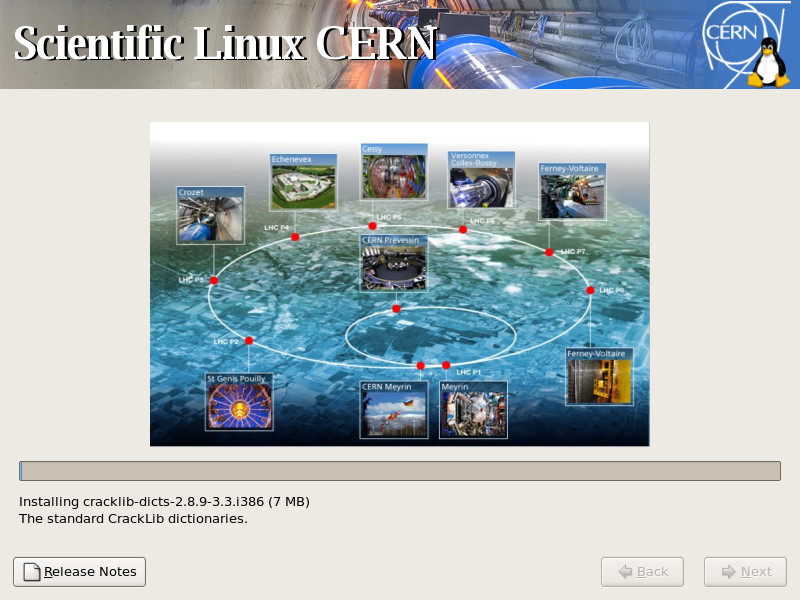 |
For next 10-20 minutes your system will be installing showing progress on screen. | |
 |
Installation is complete, please confirm system restart. |
|
Firstboot configuration adjustment |
||
| On first system boot, following configuration screens, allowing customization your system for use in CERN computing environment, will be shown. | ||
 |
|
|
 |
Date & Time setup screen allows setting of system date and clock.
Note Select the network time protocol (NTP) tab. If your system clock is not synchronized with CERN time servers AFS authentication may fail. |
|
 |
If your node is on the CERN network, enter one or more of CERN time servers to the table (Or use 'lcm --configure ntpd' later.). | |
 |
Sound card screen allows testing of the audio device. | |
 |
CERN customization screen will allow setup of system updates
mode and if AFS client should start on system boot.
Site configuration defaults will be applied for Kerberos 5, sendmail
... etc setup Note We recommend to accept default settings which should be correct for most of CERN users, these settings can be easily changed afterwards. |
|
 |
|
|
Logging in |
||
 |
After the first boot setup ends you will be presented with graphical login prompt, allowing the choice of session language and type. After choosing ... | |
 |
... KDE | |
 |
... or GNOME session will start. |
|
Manual post-install configuration adjustment |
||
If you have selected not to run X graphical
environment on your machine , or you have installed system using kickstart and you want to apply site
configuration settings, here is a short recipe:
|
||
Creating AFS user accounts |
||
After the successfull installation and initial
configuration of the system, if the computer is on the CERN network AFS
user accounts can be added using following command , as root:
|
||
Forwarding root e-mails |
||
To forward e-mails sent to the root account, simply
edit (as root) the /root/.forward file. Example file:
# cat /root/.forward User.Name@cern.ch | ||
Configuring printers |
||
Centrally managed printers can be viewed,added or removed using
as root following command:
|
||
Enabling NetworkManager for wireless access |
||
| Mainly for laptops: NetworkManager is a service that runs on your
system that allows you to easily set up your network connection, and it is especially
useful if you need to configure a wireless connection. Unfortunately, by default
NetworkManager is disabled so we have to enable it.
As root, run: # /sbin/chkconfig --level 345 NetworkManager on This makes sure that the NetworkManager is started at boot time. To start it "by hand", simply run as root: # /sbin/service NetworkManager start |
||
Applying software updates |
||
| You should update your system immediately after
it's installation: Eventual security errata and bug fixes will be
applied this way before you start using it. As root run: # /usr/bin/yum -y updateto apply all available updates. For more information about system updates please check Software Management page. For more information about system configuration please check Configuration Management page. |
||
Linux @ CERN
Made with  . Fixed with Xemacs. Last modification: Mon 01 Mar 2021 linux.support@cern.ch
. Fixed with Xemacs. Last modification: Mon 01 Mar 2021 linux.support@cern.ch